Category: Decking Advice

Should I use composite wood or hardwood for my deck?

When it comes to building a deck, one of the most important decisions you’ll have to make is choosing the right material. Two popular options that often come up in this discussion are composite wood and hardwood. Each has its own set of advantages and disadvantages, making it a matter of personal preference. In this blog post, we’ll dive into the factors you should consider when making your decision, including budget, aesthetics, functionality, durability, maintenance, and environmental impact. By the end of this article, you’ll be equipped with the knowledge needed to choose between composite wood and hardwood for your dream deck.

Budget-Friendly Composite Wood

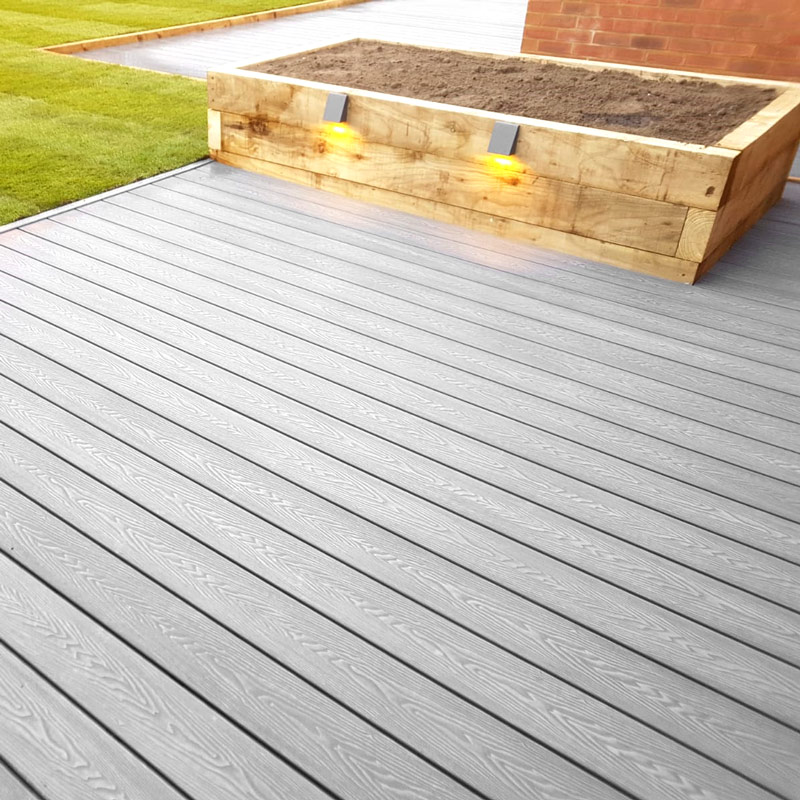
If you’re looking for a more cost-effective option without compromising on quality, then composite wood is worth considering. Made from a blend of recycled materials such as wood fibers and plastic, composite wood offers an attractive alternative to traditional hardwood decking at a lower price point. Here are some key points to consider:

1. Affordability

Composite wood typically comes at a lower upfront cost compared to hardwood. This can be especially appealing if you’re working within a tight budget but still want a high-quality deck.

2. Low Maintenance

One significant advantage of composite wood is its low maintenance requirements. Unlike hardwood that requires regular staining or sealing to maintain its appearance and protect it from the elements, composite wood only needs occasional cleaning with soap and water.

3. Durability

Composite wood is highly resistant to rotting, warping, and splintering due to its composition of synthetic materials. It also stands up well against moisture damage and insect infestation – common issues faced by decks made from natural hardwood.

While composite wood offers several benefits in terms of affordability and low maintenance, it’s important to note that there are some drawbacks as well.

composite decking boards

Considerations:

  • Composite woods may not have the same natural look and feel as hardwood.
  • Extreme heat can cause composite wood to become hot underfoot.
  • Over time, the color of composite wood may fade due to exposure to sunlight.

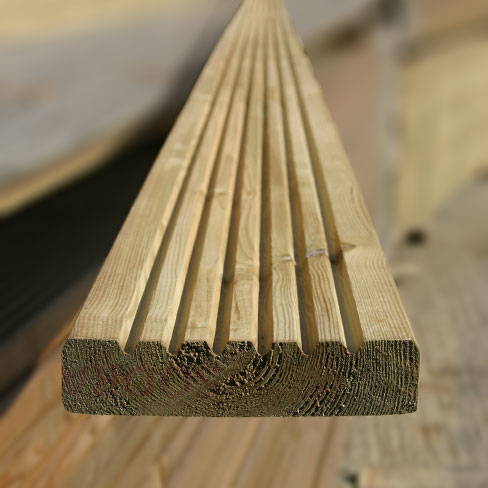
Timeless Beauty of Hardwood

If you have a higher budget and prioritize the classic appeal of natural materials, hardwood decking might be the perfect choice for you. Let’s explore the advantages that hardwood brings to the table:
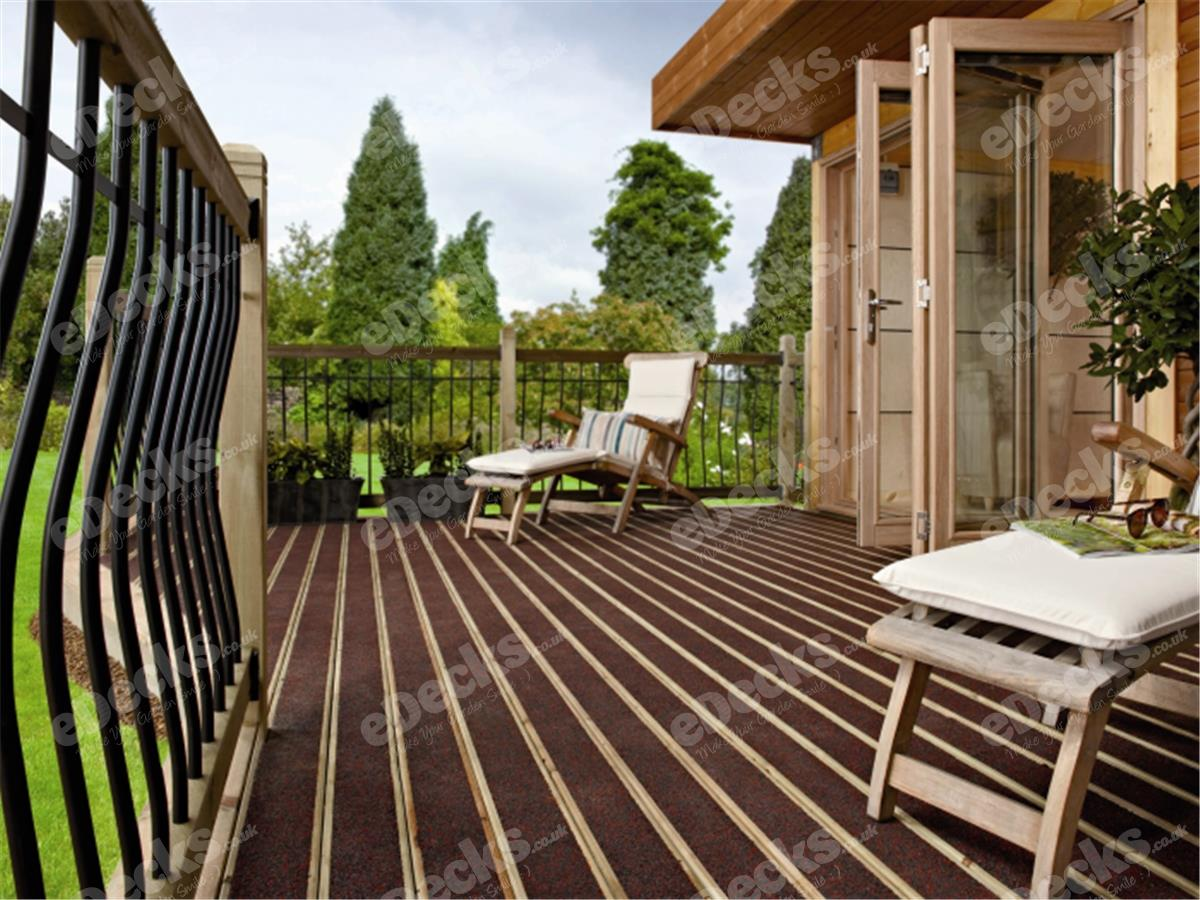
1. Aesthetics

One of the most significant benefits of hardwood is its unmatched beauty and natural warmth. The rich colors, grain patterns, and textures create a timeless elegance that many homeowners desire for their outdoor spaces.

2. Longevity

Hardwood decks are known for their exceptional durability and longevity. With proper care and maintenance, they can last for decades, maintaining their strength and beauty over time.

3. Variety

Hardwood offers a wide range of species to choose from, each with its own unique characteristics. Whether you prefer the deep red hues of Mahogany or the golden tones of Teak, there’s a hardwood option that will perfectly complement your design vision.

While hardwood decking has numerous advantages, it’s crucial to consider some potential limitations as well.

Considerations:

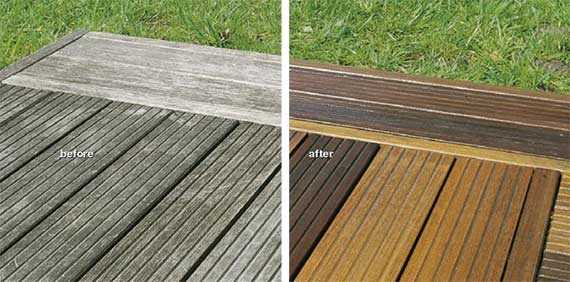
  • Hardwood generally requires more frequent maintenance compared to composite wood.
  • It is more susceptible to scratches and dents than composite wood.
  • Price points for different hardwood species can vary significantly.

In conclusion…

Choosing between composite wood and hardwood for your deck ultimately depends on various factors such as your budget, desired aesthetic appeal, functionality requirements, durability expectations, maintenance capabilities, and environmental concerns. Both options offer distinct advantages; it’s about finding the balance that aligns with your preferences and needs. Whether you opt for the affordability and low maintenance of composite wood or the timeless beauty and longevity of hardwood, investing in a well-designed deck will undoubtedly enhance your outdoor living experience for years to come.

How to Remove a Previously Failed Coating: A Guide for Decking Owners

Is your once beautiful deck now marred by a failed coating? Don’t fret! We have the solution you need to restore your decking to its former glory. In this comprehensive guide, we will walk you through the steps of removing a previously failed coating and preparing your deck for a fresh start. Whether you’re dealing with old stains, unsightly grade stamps, or peeling paint, we’ve got you covered. So let’s dive in and discover how to bring new life to your deck!

Assessing the Previous Finish

Before diving into the removal process, it’s crucial to determine the type of coating that was previously applied to your deck. This will help you select the most suitable product for effective removal. Here are some common scenarios and the corresponding recommended products:

Stripping Oils: Ronseal

If your deck has been coated with oils, whether new, old, or encrusted, Ronseal Decking Stripper is the ideal solution. This powerful stripper effectively removes oil-based finishes from exterior wooden surfaces without damaging the wood itself.

Tackling Paints, Varnishes and other finishes: Cuprinol

When faced with an oil- or alkyd-based paint, varnish, or wood stain on your decking, Cuprinol is the perfect choice. This versatile stripper cuts through these stubborn coatings with ease. For decks with old solid or semi-transparent stains or finishes, Prepdeck is your go-to product. It effortlessly eliminates these unsightly coatings and prepares the wood for a fresh application.

Dealing with Paints: Ronseal

If your deck has been painted with single or two-pack paints, Ronseal is what you need for your decking. This specialized stripper effectively removes even the toughest paint layers from wooden surfaces.

The Removal Process

Now that you have identified the appropriate product for your situation, it’s time to jump into the actual removal process. Here’s a step-by-step guide to help you navigate through it:

Step 1: Prepare the Area

Begin by clearing your deck of any furniture, plants, or other obstructions. This will create a clear workspace and prevent any potential damage to your belongings.

Step 2: Apply the Stripper

Follow the instructions provided with your chosen stripper product. Generously apply the stripper to a small section of your deck using a brush or roller. Make sure to work in manageable sections to maintain control over the process.

Step 3: Let It Soak

Allow the stripper to penetrate the failed coating according to the manufacturer’s recommendations. This typically ranges from 10 to 30 minutes but may vary depending on factors such as temperature and previous finish thickness.

Step 4: Agitate and Remove

Using a stiff scrub brush or scraper, agitate the softened coating to loosen it from the wood surface. Work in small circular motions until you see flakes of old finish coming off. Once loosened, scrape or brush away these remnants.

Step 5: Rinse and Neutralize

After successfully removing the failed coating, rinse your deck thoroughly with water to wash away any remaining residue. Next, neutralize the wood using a product like Net-Trol. This crucial step stops any residual effects from the stripper and prepares your deck for refinishing.

Conclusion

Removing a previously failed coating from your decking doesn’t have to be an overwhelming task. By selecting the appropriate stripping product and following our step-by-step guide, you’ll be well on your way to rejuvenating your deck’s appearance. Remember, whether you’re dealing with oils, stains, paints, or varnishes, there’s a solution out there for you! Take that first step towards restoring your deck’s natural beauty and creating an outdoor space you can truly enjoy.

Are Grooved Timber Boards Less Slippery than Plain Boards?

When it comes to decking options, one question that often arises is whether grooved timber boards are less slippery than plain boards. It’s a valid concern, especially for those who prioritize safety and want to ensure a secure surface for their outdoor activities. In this blog post, we will delve into the topic of grooved versus plain timber boards and explore the factors that contribute to their slip resistance. By the end, you’ll have a clearer understanding of which option might be best suited for your decking needs.

The Purpose of Grooved Timber Boards

Before we dive into the slipperiness aspect, let’s first understand why grooved timber boards exist in the first place. Grooves or channels are typically added to decking boards for improved drainage purposes. These indentations allow rainwater to flow off the surface more easily, reducing the risk of standing water and potential rotting or decay over time. Consequently, if you live in an area with high rainfall or have concerns about moisture accumulation on your deck, grooved boards can be beneficial.

Considerations for Slip Resistance

While many assume that grooved timber boards provide better traction due to their textured surface, it’s important to note that slip resistance is influenced by various factors beyond just the presence of grooves. Let’s explore some key considerations:

1. Material Choice

The type of timber used for your decking plays a significant role in its slipperiness. Some hardwood species naturally possess higher levels of grip due to their texture and grain pattern. For example, teak and ipe are known for their excellent slip-resistant properties even without any additional surface treatment.

2. Moisture Content

Moisture content on your deck can greatly impact its slipperiness. Both plain and grooved timber boards can become slippery when wet, as water acts as a lubricant between shoes and the wood surface. Regular cleaning and maintenance are essential to prevent the buildup of algae, moss, or any other substances that can make your deck slippery.

3. Surface Texture

The texture of the timber boards, whether grooved or plain, contributes to their slip resistance. Grooves can provide additional grip by creating more contact points between shoes and the deck’s surface. However, it’s worth noting that dirt and debris could accumulate within the grooves over time, potentially reducing their effectiveness. On the other hand, plain boards may have a smoother surface but can still offer sufficient traction depending on the type of timber used.

4. Maintenance Practices

Proper maintenance is key to ensuring slip resistance regardless of the type of decking you choose. Regularly cleaning your deck with appropriate solutions and removing any potential hazards like leaves or ice will help maintain its grip over time.

Aesthetics versus Slip Resistance

When deciding between grooved and plain timber boards, it’s crucial to consider your priorities. If you live in an area prone to rain or simply want better drainage for your deck, grooved boards may be a practical choice for you. However, if slip resistance is your primary concern and moisture accumulation isn’t an issue, choosing a high-quality timber species with a natural grip might be equally safe and visually pleasing.

Conclusion: Finding the Perfect Balance

In conclusion, while grooved timber boards are often chosen for improved drainage capabilities rather than their slip resistance alone, they can still contribute positively to overall safety when combined with other factors like material choice and proper maintenance practices. Ultimately, finding the perfect balance between aesthetics and functionality is key when it comes to selecting decking options that suit both your personal preferences and safety requirements.

So whether you opt for grooved or plain timber boards on your deck, remember to prioritize regular maintenance, consider the specific environmental conditions of your area, and select a reliable supplier who offers high-quality materials. By doing so, you can create a beautiful and safe outdoor space where you can confidently enjoy countless memorable moments.

How to Maintain a Safe and Slip-Free Deck

When it comes to creating an inviting outdoor space, a beautifully constructed deck can be a wonderful addition to any home. However, one of the concerns that may arise when considering decking is the potential for slips and falls, especially in wet or damp conditions. Fortunately, there are effective measures you can take to avoid a slippery deck and ensure safety for yourself, your family, and your guests. In this blog post, we will explore two key strategies for maintaining a safe and slip-free deck: using products with added grip and implementing regular cleaning maintenance throughout the year.

Choose Products with Added Grip

The first step in preventing slips on your deck is selecting materials that offer enhanced traction. One excellent option is Antislip, a product specifically designed to provide grip in areas prone to moisture accumulation, such as around pools or hot tubs. Antislip contains grit or beads that create friction between your feet and the surface of the deck, significantly reducing the risk of slipping even when wet. By incorporating Antislip into your decking materials, you can enjoy peace of mind knowing that safety has been taken into account during the construction process.

Regular Cleaning Maintenance

While using products like Antislip is essential for slip prevention, it’s important to understand that they are not standalone solutions. Regular cleaning maintenance plays a vital role in keeping your deck safe and free from hazards caused by dirt, debris, moss, or algae buildup. Here are some key steps you can take:

Sweeping

Make it a habit to sweep your deck at least once a week to remove leaves, dirt, dust particles, and other loose debris that may accumulate over time. By keeping the surface clear of these substances regularly, you minimize the chances of them getting moist or forming slippery layers.

Pressure Washing

In addition to sweeping, periodic pressure washing helps maintain the cleanliness of your deck effectively. A pressure washer can be used to remove stubborn grime, moss, or algae that may have developed on the surface. However, it’s important to exercise caution and use the appropriate settings to avoid damaging the wood.

Wood Cleaning Products

If you find that your deck requires more extensive cleaning due to neglect or heavy soiling, there are specialized wood cleaning and brightening products available. One such product is Net-Trol, which effectively cleanses and revitalizes wooden surfaces. By following the instructions provided with these products, you can restore your deck’s appearance while also improving its safety by eliminating potential slip hazards.

Regular cleaning maintenance ensures that your deck remains in optimal condition throughout the year. By investing a little time and effort into this routine, you’ll be rewarded with a safer and more enjoyable outdoor space for everyone.

Additional Tips for Slip-Free Decking

In addition to using grip-enhancing products like Antislip and maintaining regular cleaning practices, here are some extra tips to further enhance the safety of your deck:

  • Apply Non-Slip Coatings: Consider applying non-slip coatings or sealants specifically designed for decks. These coatings create an additional layer of protection against slips.
  • Use Outdoor Rugs or Mats: Placing outdoor rugs or mats strategically on high traffic areas can provide extra traction when moving across your deck.
  • Trim Surrounding Foliage: Trim any nearby trees or plants that may drip excess moisture onto the deck, as this can contribute to slippery conditions.
  • Promptly Address Spills: Accidents happen, but it’s crucial to promptly clean up any spills on your deck to prevent potential slip hazards.

By incorporating these additional measures into your deck maintenance routine, you’re taking proactive steps toward creating a safe and slip-free environment for all who enjoy your outdoor space.

Conclusion: Enjoy Your Deck Safely

A well-maintained deck not only enhances the aesthetic appeal of your outdoor area but also provides a safe and enjoyable space for relaxation and entertainment. By choosing grip-enhancing products like Antislip, implementing regular cleaning practices, and considering additional safety measures, you can avoid a slippery deck and ensure the well-being of yourself, your loved ones, and your guests. With these precautions in place, you can confidently enjoy the beauty of your deck without worrying about slips or falls. So go ahead, create unforgettable memories on your slip-free deck!

Can I Change the Colour of My Decking?

If you have a timber deck and find yourself yearning for a fresh look, then the answer is yes – you can definitely change the colour of your decking. Many people initially opt to paint their decks, only to realize a few years later that they prefer the charm of a natural wood finish. If you’re considering giving your deck a makeover, this blog post will guide you through the process and provide useful insights to help you achieve your desired outcome.

Understanding Your Options

Before delving into the details of changing your deck’s colour, it’s important to understand your options. There are various methods available, each with its own set of advantages and considerations:

  1. Painting: Painting is one way to transform the look of your deck entirely. It offers endless possibilities in terms of colour choices and can completely cover up any existing stains or discoloration on the wood surface. However, keep in mind that once painted, it may be challenging to revert back to a natural wood finish.
  2. Staining: Staining is another popular option for changing your deck’s colour while still allowing the natural beauty of the wood grain to shine through. Stains come in different opacities – from transparent to semi-transparent and solid – providing varying levels of coverage.
  3. Deck Overlays: If you’re looking for a drastic change in both color and texture, consider installing deck overlays. These are essentially thin composite boards that can be placed over existing decking material, instantly transforming its appearance.

Now that we’ve explored some options for changing your deck’s colour let’s dive deeper into each method.

Removing the Previous Finish

Regardless of which method you choose, removing the previous finish is crucial for achieving optimal results. Here are some steps you should follow:

  1. Assessing the condition: Inspect your current finish carefully before proceeding with any removal. If the existing paint or stain is in good condition, you may be able to apply a new coat directly over it after proper preparation. However, if the finish is peeling, flaking, or significantly worn down, it’s best to remove it entirely.
  2. Stripping the old finish: To remove the previous finish, you can utilize chemical strippers or mechanical methods like sanding or power washing. Chemical strippers are effective but require caution and proper safety measures during application. Sanding may take more time and effort but offers precise control over the removal process.
  3. Preparing the surface: After removing the previous finish, thoroughly clean your deck to ensure there is no debris or residue left behind. This step is crucial for achieving a smooth and even application of your new colour.

Once you’ve completed these initial steps, you’re ready to move on to applying your desired colour to your decking.

Painting Your Deck

If you decide that painting is the best option for changing your deck’s colour, here are some important considerations:

  1. Choosing the right paint: Opt for a high-quality exterior paint specifically formulated for decks and other outdoor surfaces. These paints are designed to withstand UV rays, moisture, and foot traffic.
  2. Prepping the surface: Before painting, make sure your deck is clean and dry. Fill any cracks with wood filler and sand down rough areas for a smooth finish.
  3. Applying primer: If you’re painting a bare wood deck or drastically changing colours, applying a primer will enhance adhesion and improve the longevity of your paint job.
  4. Painting technique: Use long, even strokes with a brush or roller for an even coat of paint on your deck boards. Apply multiple thin coats rather than one thick coat for better durability.

Remember that once your deck is painted, maintaining its appearance will require periodic touch-ups or repainting as needed.

Staining Your Deck

If you prefer to enhance the natural beauty of your timber deck while changing its colour, staining is an excellent choice. Consider the following steps for a successful staining project:

  1. Choosing the right stain: Select a high-quality exterior wood stain that suits your desired colour and opacity. Transparent stains allow the most wood grain to show through, while semi-transparent and solid stains provide greater coverage.
  2. Prepping the surface: Like with painting, ensure your deck is clean and dry before applying stain. Sanding may be necessary to remove any remnants of previous finishes or rough areas.
  3. Applying the stain: Use a brush, roller, or sprayer to apply an even coat of stain in the direction of the wood grain. Work in manageable sections to avoid lap marks or uneven color distribution.
  4. Sealing the finish: To protect your newly stained deck from weather elements and foot traffic, it’s crucial to seal it with an appropriate exterior wood sealer or topcoat.

Regular maintenance will involve periodic reapplication of stain as recommended by the manufacturer.

Conclusion

Changing the colour of your decking can breathe new life into your outdoor space and provide a fresh aesthetic appeal. Whether you choose to paint or stain, proper preparation and meticulous application are key for achieving beautiful and long-lasting results. Consider your preferred look, durability requirements, and maintenance expectations when selecting a method for changing your deck’s colour. With careful planning and execution, you’ll soon be enjoying a transformed deck that perfectly complements your outdoor oasis!

Navigation