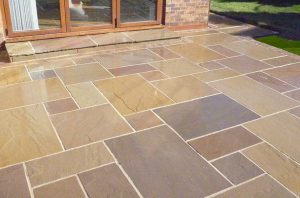
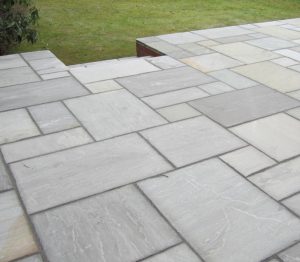
Here at eDecks we have a wide range of Indian Stone Paving and so we have put together an installation guide to help you with your project.
Step 1: Digging the Foundation
You will need to allow 150mm for foundation mix and paving, and if you are laying the stone directly next to a house then the finished patio should be at least 150mm below the damp proof course. This means that you will need to dig out the area to a minimum depth of 300mm below the damp proof course.
To ensure that water does not collect on the stone, the foundation needs to have a fall of 1 in 60, which means a one centimetre of fall for every 60cm of width. For example, a 3m wide patio will need 5cm or 50mm of fall.
Step 2: Preparing the Foundation Base
To create the firm foundation, use a concrete mix of 6 parts all in one ballast with 1 part cement. Mix and add enough water to dampen the mixture just enough so that it binds together. Cover the entire area with the mix to a depth of 75mm, level it out with a shovel and then tamp down using a length of timber or trample down with your shoes.
Step 3: Mortar Preparation
Lay the Indian Stone Paving slabs on a full mortar bed, which should support the whole slab, and not just the corners. You must ensure that there is contact with the whole of the back of the slab and the mortar. To create the mortar mix, use 6 parts sharp sand to 1 part cement and mix together with just enough water to make it damp and workable, but not overly wet and runny. It is important that ALL granite paving must have a cement and SBR liquid slurry mix painted on the entire back on the slab before fixing. If you do not do this, it may result in the slabs drying out at different rates and causing patchiness or effect the surface of the slabs.
Step 4: Laying the Paving
Begin by setting up 2 taut string lines to guide both the line and the level of the paving. One line should run down the length of the patio and the second line side to side, with one including the fall for drainage. Start from the corner and work your way outwards from there. All paving must be mixed and blended together and laid dry before any installation. If you have several sets of Indian Stone, we recommend you using slabs from all sets to ensure you have an even blend.
Spread out mortar to cover an area slightly larger than the paving slab you want to lay and high enough to allow you to tap down the flag to the correct level. The bed should be approximately 30-40mm which will squash down. Lift and lower the slab into place and be careful not to catch the corners. Use a rubber mallet to start tapping it down and hit the paver, firmly but not too hard, at a point which is roughly midway between the centre of the paving slab and each corner along imaginary diagonals. Move around the paving, tapping in succession until the flag settles down to the correct level.
Ensure you check that the paving is level by using a spirit level and that you have included a fall, and then start to lay the rest of the paving, leaving joints as required. Once laid, the area should then be left for at least 24 hours to allow for the bedding mortar to harden and should not be walked on.
Step 5: Jointing the Paving
To joint the paving, use a mortar mix of three parts soft building sand to one part cement and mix it slowly adding a little water at a time until you reach a smooth, damp consistency – not wet or sloppy. A plasticiser can be added to make the mortar easier to work with. Use a trowel or pointing gun to put the mortar into the joints, pressing it down and smoothing over using a pointing bar if necessary. Be careful to avoid any mortar going onto the surface of the paving slab as this could end up staining the slab. If this does happen it should be wiped off immediately.
Once the mortar has hardened, all you need to do is then give the area a good sweep and that’s the job done!
eDecks offers some of the best deals on Indian Stone Paving around, including all of the installation supplies and tools you may need. Not only do we provide plenty of unbeatable deals but also:
Super-fast FREE delivery on orders over £100*
48 Hour Delivery on many products
Handy FREE installation guides and instructional videos
*Free delivery applies to most of the UK, but some areas may incur a charge. Please check the eDecks website for more details.







Great info very explanitary
Nice guide on how to install indian stone paving. Very Detailed and on point. Thank you for sharing.
How do you measure how much indian paving you need for a job
Hi Michael,
Please contact our sales team on [email protected] or 0330 100 2530 option 2, who will be more than happy to help with this,
Thanks,
eDecks.
Very informative…worth reading it
I have existing large red gravel, can this be used as a base after being dug out and compacted with some motar, then lay paving on motar in the usual way? Using the existing gravel would save buying sub base material any advice would be appreciated